Pine Tree Post | Craft Page
Need a great gift for someone special, but, want to keep it simple and environmentally friendly?
Then the Stick Jar is the thing for you!
 |
| Cute! |
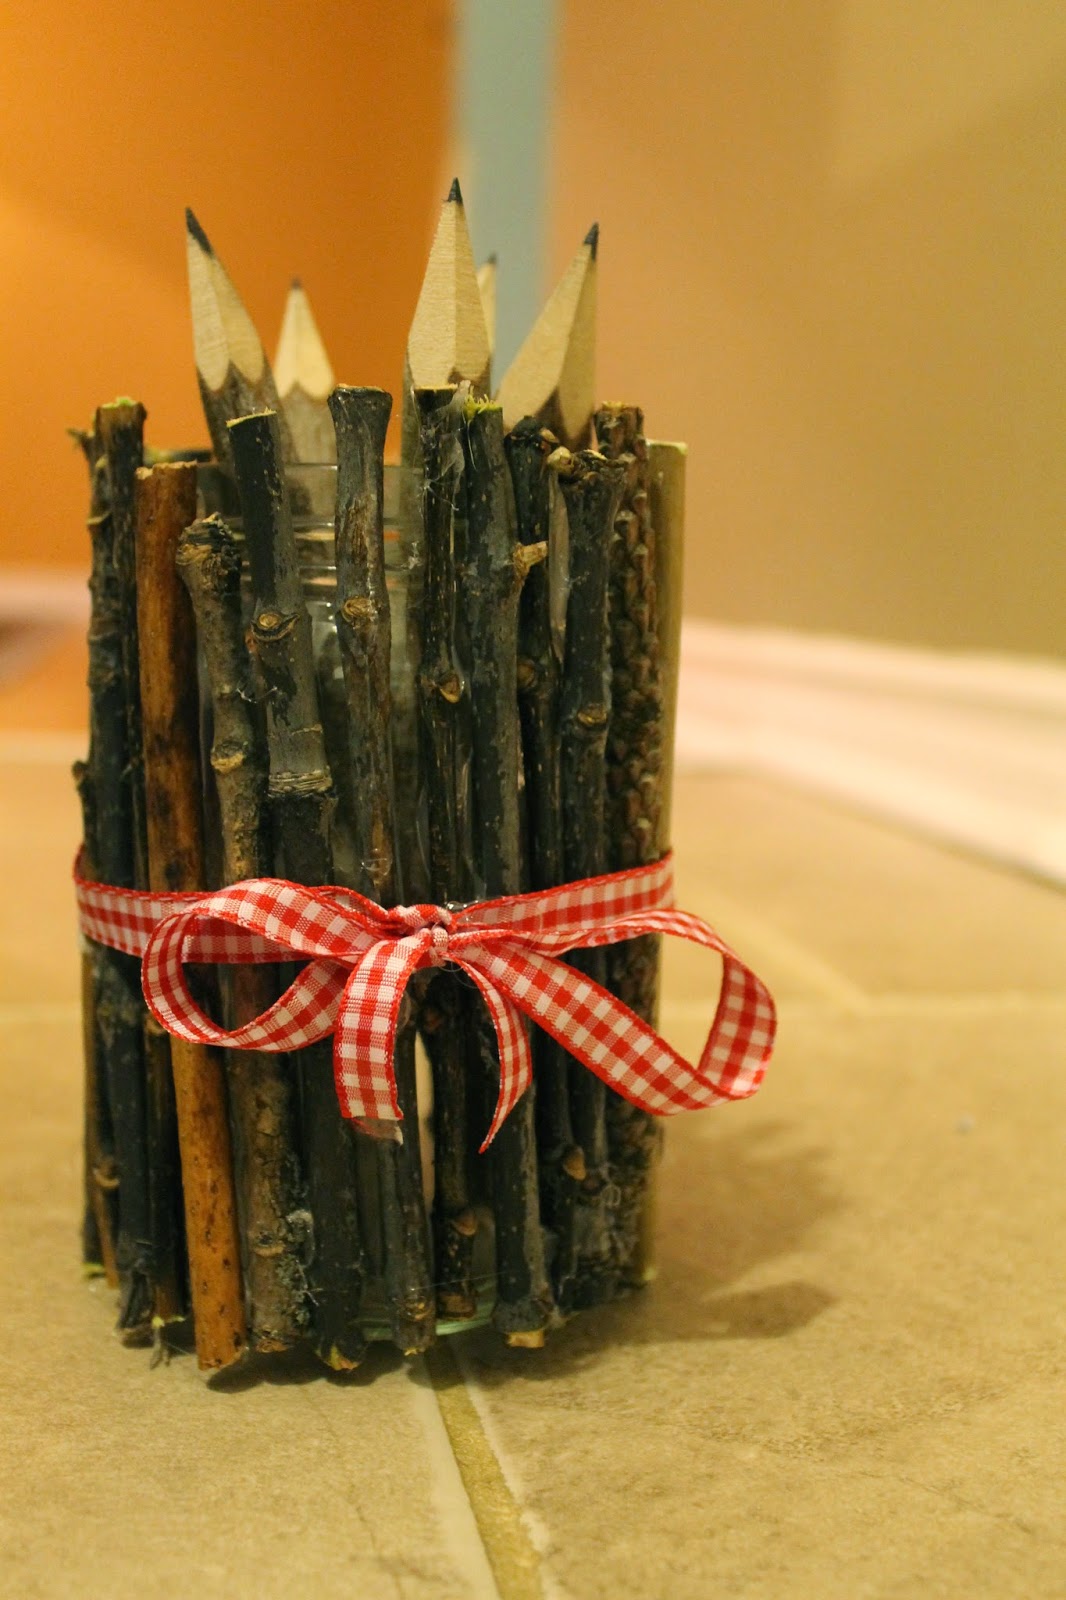
This multifunctional jar is not only attractive but can be used to hold sharpened pencils, dull pencils, pencil crayons, pens, and even most markers. Other things, non pencil related, that it can hold nicely include fresh flowers, striped drinking straws, or even really long pickles!
Now that we know how much this jar can do, how valuable it can be, how useful it would be in anyone's life..you are probably thinking it will be out of your price range? Well you are wrong! This jar is almost free! Yes, FREE (almost)!
Do I have your attention? Are you still skeptical? Thinking the materials may be almost free, but, what's the catch? Is there a lot of work involved? Skill? A special tool that you need to buy? No, that is where you are wrong again (especially if you have children and make them do the leg work).
Let me show you how easy and affordable this stick jar really is to make. Again, make sure you include the children to do most of the running around.
Step 1: You need to collect a bucketful of sticks. Send the kids out into the yard, tell them to act like beavers and collect up food (aka sticks) for the winter. Make sure you go through the 'food' and remove any rotten sticks. Twigs or big limbs are also tricky to work with, so you may have to chuck them as well. Make sure you tell your little beavers they did a wonderful job - that will motivate them to do your bidding later.
Also, tell the oldest one to go hunting through the recycling box for a glass jar. Jam jars or mason jars are the ideal size and shape.
 |
| No rotten or curvy sticks in this bucket of beaver food. |
Step 2: You need to measure for length. Ideally, you want the stick to be just a little longer than the jar. When you glue the sticks onto the jar it is nice if they hide the opening a bit. To measure, I cut a stick, held it against the jar, marked the other end and cut again. Then I put some tape on my saw to show me how long to cut each stick. Then, raar raar, I went to work sawing sticks like it was nobody's business.
However, the children started getting bored. To avoid a power saw accident I distracted them with saws of their own - see Step 3.
 |
| Just a little longer than the jar |
 |
| Measure. Tape it off. |
 |
| More power! |
Step 3: Teach the children a lesson in sawing. This craft is a good opportunity to introduce the basic sawing tool - the mitre box. Again, measure out the length of stick you want and place a piece of tape on your mitre box. Show the children how to place their saw (I use a dull saw with the children) in the cut outs and let them go to town. You really should watch them, and you may even have to hold the box to stop it from moving around. Obviously, I encourage safety glasses too (whoops).
 |
| Saw, saw, saw... |
 |
| Let the teeth do the work...hey, where are you safety glasses?! |
 |
| Done. |
We also glued a ribbon around the jar and tied it in a bow. This is another activity the children can do. Send them to the craft storage and allow them to pick out an appropriate ribbon (you may need to remind them that skulls are for Halloween only). They can cut it to length and possibly even tie a bow.
 |
| Add some ribbon for flare |
Step 5: Now fill up that jar - add pencils, pens, flowers, or turkey pepperettes. We found some wonderful pencils that look just like sticks! A perfect match for this craft.
 |
| Stick pencils |
 |
| Fill 'er up |


